Do Laser Cleaning Machines Really Work?
If you’ve ever tried to remove rust, paint, oxide, or oil with blasting, chemicals, or aggressive grinding, you already know the pain: inconsistent results, messy media, surface damage, rework, and compliance headaches. The consequences are not small—poor adhesion after painting, premature corrosion, dimensional change on precision parts, and real downtime when you stop production to clean up dust, sludge, or spent abrasive. Laser cleaning is marketed as a “miracle” alternative, but buyers worry about the same thing you’re asking: will it actually remove the contaminant reliably without harming the base material, and will it do that day after day in a factory—not just in a demo video?
Yes—laser cleaning machines really work when the laser type (CW vs pulsed), wavelength, power, spot size, scan strategy, and process window (fluence and overlap) are matched to the contaminant and substrate. Laser cleaning removes surface layers by controlled ablation, thermal shock, and bond disruption, enabling precise rust/oxide/paint removal with minimal base-metal loss, strong repeatability, and lower consumables compared with blasting or chemicals—provided you manage safety (fume extraction, eyewear, interlocks) and validate parameters with sample trials.
What follows is a practical, factory-minded technical guide that treats laser cleaning as a process—not a gadget. I’ll walk you through how it works physically, where it excels, where it struggles, how to select a machine, how to set parameters, how to quantify quality (including adhesion and roughness), and how to calculate real ROI. Use it as a decision and implementation playbook whether you’re buying your first unit or scaling to multiple stations.
Table of Content
HIDE
1: Understand the “Works” Part—What Laser Cleaning Is Actually Doing (Not Marketing)
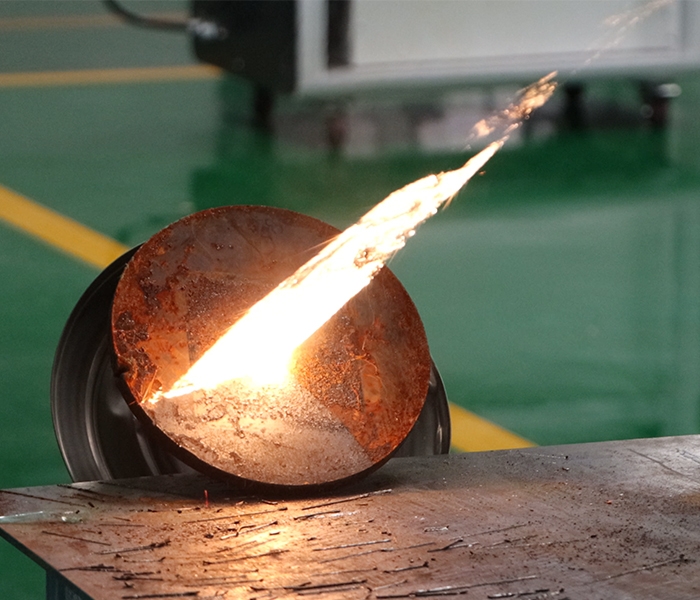
Laser cleaning works because contamination layers and base materials do not respond identically to concentrated optical energy delivered in carefully controlled pulses or a tightly scanned beam. In practical terms, a laser cleaning head raster-scans a spot across the surface; each pass delivers energy to the top layer (rust, oxide, paint, oil film, carbon, residue). The top layer absorbs a portion of that energy and experiences one or more removal mechanisms:
(1) ablation (material transitions into vapor/particulate when local energy density exceeds the layer’s removal threshold),
(2) thermal expansion mismatch (rapid heating causes differential expansion between the contaminant layer and substrate, breaking adhesion),
(3) photomechanical shock (especially with pulsed lasers where rapid heating produces micro-shock that fractures brittle oxides), and
(4) selective absorption (many contaminants absorb differently than polished metals at certain wavelengths; rust and oxides are usually more absorptive than clean steel or aluminum).
The “magic” is not that lasers ignore metal; it’s that you tune the process so the contaminant reaches its removal threshold before the substrate reaches its damage threshold. That gap between thresholds is your process window, and it is why some demos look effortless while some real factories struggle when they try to clean everything with one set of settings.
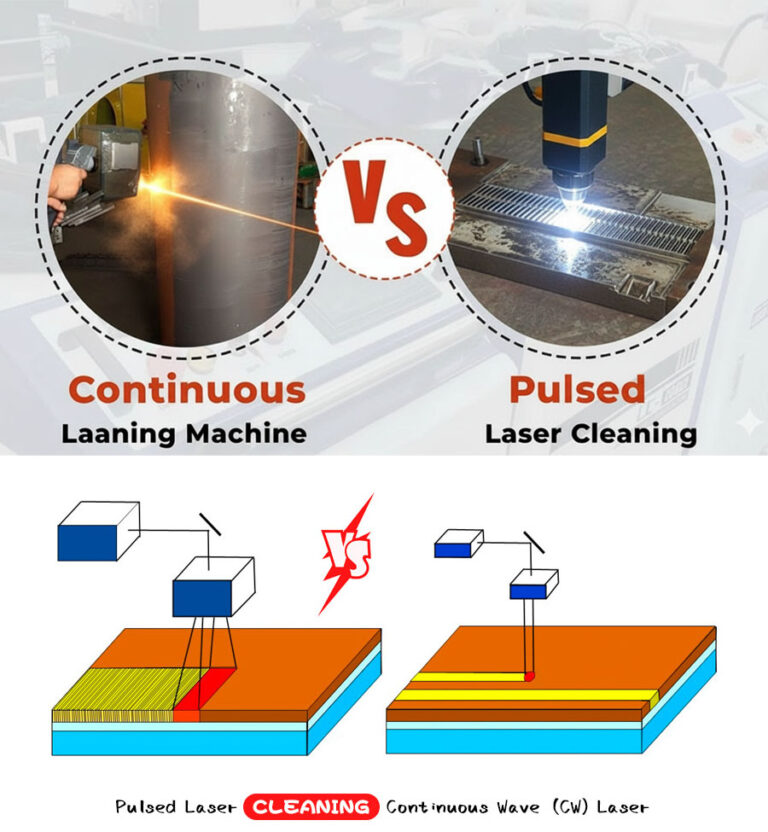
Two broad machine categories dominate industrial laser cleaning: continuous-wave (CW) fiber lasers (often 1–3 kW and up, strong for large-area stripping and high throughput) and pulsed fiber lasers (often 50–500 W average, high peak power, excellent control for delicate surfaces, molds, weld prep, and selective cleaning). CW systems remove material by sustained heating and rapid scanning, which can be very productive but can also introduce heat tint, micro-melting, or substrate temper effects if scan speed/overlap is poorly set. Pulsed systems remove via high peak power in short bursts; they can be gentler on the base and better at removing thin films precisely, but total throughput may be lower on thick rust or multi-layer coatings unless you scale power appropriately. In both cases, the real performance driver is not just “watts,” but fluence (energy per unit area), overlap (how much adjacent scan lines overlap), dwell (effective exposure time per point), and beam delivery (spot size and scan field). If you evaluate machines only by nameplate power, you’ll miss what makes a laser cleaning machine “really work” on your parts.
A useful factory mental model is to treat laser cleaning like CNC machining for surfaces: the laser is the tool, the scan pattern is the toolpath, and fluence/overlap are your feed and depth-of-cut equivalents. That’s why repeatability can be excellent when parameters are locked down, and why results can be inconsistent when operators “turn knobs” without understanding. Once you adopt that process mindset, laser cleaning becomes highly predictable—because physics is predictable when you stay inside a validated window.
2: Know What “Working” Means—Define Acceptance Criteria Before You Buy
Laser cleaning “works” only relative to a target outcome. In real production, you typically care about one (or more) of these acceptance goals: visual cleanliness, adhesion performance after coating, weld quality, oxide thickness removal, surface roughness control, no substrate damage, no dimensional change, and cycle time. The mistake buyers make is accepting a flashy demo as proof, without specifying measurable criteria. For instance, removing brown rust to a bright finish is easy to judge visually, but if your real need is paint adhesion for a marine coating system, you must verify that laser cleaning yields stable adhesion comparable to (or better than) blasting at a specified surface profile and cleanliness standard. Similarly, for weld prep on aluminum, the key is removal of oxide and organics in a controlled way, not necessarily producing a mirror-bright finish.
To operationalize this, define acceptance criteria in three layers. First, process cleanliness metrics: percentage of area cleaned, residual contaminant level (qualitative tape test for oils, water-break test for degreasing, or fluorescence methods where applicable), and oxide removal confirmation (sometimes via simple visual plus controlled comparison coupons). Second, substrate integrity metrics: confirm no overheating (color/tint, temper indicators on steel), no micro-melting on edges, and minimal base loss (mass change on sample coupons, or micrometer checks on critical surfaces). Third, downstream performance metrics: adhesion testing (cross-hatch, pull-off as required by your coating spec), weld porosity rates, or corrosion performance (salt fog for coated panels if you have that capability).
To make those criteria practical, build a sample test plan before purchase: choose 3–5 representative part types (worst-case contamination, thin sections, heat-treated parts, complex geometry). Ask for laser trials with documented parameters: power, scan speed, line spacing, number of passes, spot size, and cleaning width. You want repeatable recipes, not “we can do it.” The reason this matters is that laser cleaning is excellent at precision and repeatability—but only after parameter validation. If you demand that validation upfront, you de-risk the purchase and avoid the “it worked in the showroom but not on our line” scenario.
Finally, define “working” in throughput terms. A machine that cleans perfectly but is too slow does not work commercially. Conversely, a machine that is fast but causes rework also fails. Put numbers on it: target square meters per hour or minutes per part, allowable rework percentage, and maximum acceptable temperature rise for sensitive parts. Once you define that, you can compare technologies fairly.
3: Choose the Right Laser Cleaning Architecture (CW vs Pulsed, Handheld vs Automation)
Selecting the architecture is where most outcomes are decided. The key decision tree is: contaminant thickness and hardness, substrate heat sensitivity, geometry complexity, and how you will run the process (handheld, robotic, inline). CW fiber laser cleaning (often 1000–3000 W) is typically chosen for heavy rust on steel structures, large-area paint stripping, shipyard and bridge maintenance, and high-volume, large-surface industrial tasks. It shines when you need speed on robust substrates and can manage heat with high scan speed and controlled overlap. Pulsed fiber laser cleaning (often 100–500 W average with high peak power) is frequently chosen for molds, precision parts, weld seam prep, battery tabs, aerospace components, and scenarios where you want minimal substrate interaction and high selectivity—especially on thin sections, tight tolerances, or sensitive alloys. There are hybrids and higher-end pulsed systems (higher average power) that close the throughput gap, but the principle remains: CW for productivity on robust work, pulsed for control and selectivity.
Next is delivery: handheld systems offer flexibility for varied parts and fieldwork; they require operator training because angle, standoff, and dwell can drift. Robot/gantry systems maximize repeatability and throughput; they require more engineering but produce consistent results and predictable cycle times. Many factories start handheld to validate the process and then move to automation once recipes and fixturing are proven. If your work is repetitive (same parts every day), automation pays quickly because it reduces variability and safety exposure.
Below is a practical selection matrix to align your use case with machine type. Use it as a starting point, then validate with trials.
| Application | Typical Contaminant | Substrate | Priority | Recommended Laser Type | Typical Delivery | Notes |
|---|---|---|---|---|---|---|
| Heavy rust removal on structural steel | Thick rust, scale | Carbon steel | Throughput | CW fiber (1–3 kW+) | Handheld / gantry | Manage heat; multi-pass with fast scanning |
| Paint stripping on large panels | Multi-layer paint | Steel/aluminum | Throughput + control | CW fiber or high-power pulsed | Gantry/robot | Consider fumes; coating chemistry matters |
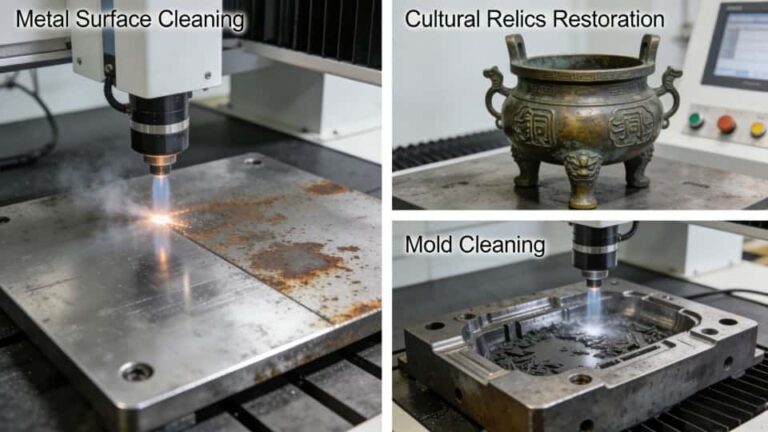
| Mold cleaning (rubber/plastic) | Carbonized residue | Tool steel | Surface integrity | Pulsed fiber | Handheld / cell | Low base loss; recipes matter |
| Weld preparation (steel) | Oil, oxide | Steel | Consistency | Pulsed or tuned CW | Inline/robot | Focus on oils/oxides; validate porosity reduction |
| Aluminum oxide removal | Oxide + organics | Aluminum | Selectivity | Pulsed fiber | Robot preferred | Aluminum reflectivity and heat conduction require tuning |
| Heritage/stone cleaning | Soot/crust | Stone | Gentle removal | Pulsed (specialized) | Handheld | Often specialized wavelengths; proceed carefully |
| Battery/EV components | Thin films, oxide | Cu/Al/Ni | Precision | Pulsed fiber | Automation | Tight process windows; logging recommended |
This matrix highlights why “laser cleaning works” is not a single answer: it depends on choosing the correct process class. A supplier who insists one configuration fits everything is either inexperienced or oversimplifying.
4: Learn the Parameter Language—Fluence, Overlap, and Why Power Alone Misleads
Most performance confusion disappears when you speak the right parameter language. Laser cleaning outcomes are controlled by a small set of variables that interact: average power, pulse energy (for pulsed lasers), pulse frequency, pulse width, spot size, scan speed, line spacing, and number of passes. The most useful derived metric is fluence (energy per area per pass). In simple terms: if the fluence is below the contaminant’s removal threshold, you will polish or heat but not remove. If fluence is above the substrate damage threshold, you will etch, melt, discolor, or change microstructure. Your goal is to operate between those thresholds with enough margin for real-world variability: surface angle changes, contamination thickness variation, and operator movement.
Overlap is the second critical factor. Even with the correct fluence, poor overlap yields striping, incomplete removal, or heat accumulation lines. Overlap is influenced by scan line spacing and scan speed relative to spot size and repetition. A common production tactic is to tune for a single-pass “good enough” recipe for speed, then add a second lighter pass for uniformity if aesthetics or downstream coating requires it. This is often faster overall than trying to force one aggressive pass that causes occasional substrate marks and rework.
To make these concepts practical, use a parameter window table during trials. Record settings and results in a disciplined way. A template like the one below helps you build recipes that transfer across shifts and operators.
| Recipe ID | Laser Type | Avg Power | Scan Speed | Line Spacing | Passes | Spot Size | Result (Rust/Paint/Oil) | Substrate Effect | Notes |
|---|---|---|---|---|---|---|---|---|---|
| R-01 | Pulsed | 200 W | 6000 mm/s | 0.08 mm | 2 | 0.3 mm | Removes light rust fully | No discoloration | Best for thin parts |
| R-02 | CW | 1500 W | 12000 mm/s | 0.15 mm | 1 | 1.0 mm | Removes medium rust | Minor heat tint | Increase speed or reduce overlap |
| R-03 | Pulsed | 300 W | 8000 mm/s | 0.10 mm | 1 | 0.3 mm | Removes oil film | None | Use fume extraction; water-break passed |
| R-04 | CW | 2000 W | 9000 mm/s | 0.12 mm | 2 | 1.0 mm | Paint strip to primer | Edge warming | Use masking/fixtures on thin edges |
When you adopt this recipe discipline, you remove the mystery. Laser cleaning becomes a controlled, auditable process rather than a “skill trick.” This is also how you scale to automation: your recipes become your process documentation.
5: Validate on Real Parts—A Factory Test Protocol That Prevents Buyer’s Remorse
A reliable validation protocol is what separates a successful installation from a disappointing purchase. In our experience as machinery engineers, the most effective protocol has four phases: (1) representative samples, (2) parameter mapping, (3) quality verification, and (4) throughput confirmation. Start by selecting representative samples that cover your extremes: thick rust, thin sheet, heat-treated parts, corners and edges, oily residues, and coated surfaces. Include at least one “worst-case” part that historically causes trouble with blasting or chemicals. If your acceptance criterion includes downstream coating or welding, prepare enough samples to test after processing, not just immediately after cleaning.
Next, do parameter mapping: instead of testing one setting, map a small matrix. For example, choose three scan speeds and three line spacings at a fixed power, and observe outcomes. Then adjust power. For pulsed systems, vary frequency and pulse energy combinations. The point is to identify a stable window where small variations still produce acceptable results. A demo that works only at one “knife-edge” setting is fragile in production. A windowed recipe is robust.
Then do verification. If you paint, do a simple adhesion check (even a preliminary cross-hatch) and compare to your current process. If you weld, do test welds and compare porosity or defect rates. If you rely on corrosion resistance, at minimum, ensure you are not leaving residues (especially oils) that undermine coatings. Also verify substrate: inspect under consistent lighting, check for discoloration, measure critical dimensions if applicable, and confirm roughness requirements. Note that laser cleaning does not necessarily create the same surface profile as blasting; sometimes that is good (less metal loss), sometimes you need a controlled profile for coatings, in which case you may combine laser cleaning with light mechanical profiling or choose a recipe that yields micro-texturing without damage.
Finally, confirm throughput honestly. Time a full cleaning cycle including part handling, positioning, fume extraction settling, and any required wipe-down. Many ROI disappointments happen because people time only the “beam on” portion and ignore handling. If you plan automation, include robot traverse and fixture indexing time. This is where a supplier who understands manufacturing can help you engineer the station, not just sell the laser.
6: Know the Real Strengths—Where Laser Cleaning Outperforms Blasting and Chemicals
Laser cleaning’s strongest value proposition is not simply “it removes rust.” It is selective, controllable removal with low consumables and high repeatability, often reducing process variability and secondary waste streams. In abrasive blasting, media consumption, dust, nozzle wear, and containment are ongoing costs; you also risk embedding media into surfaces, especially in softer substrates or complex geometries. Chemical stripping can be effective but introduces chemical handling, disposal, ventilation, and potential substrate compatibility issues. Grinding and wire brushing are labor-intensive and inconsistent, and they can smear contaminants rather than remove them, especially oils and certain coatings.
Laser cleaning excels in scenarios where precision matters: cleaning a weld zone without scuffing adjacent surfaces; removing oxide on a flange face without changing flatness; cleaning molds without rounding edges; stripping coatings in controlled patterns; cleaning in a way that is easier to document for quality systems. Because the process can be parameterized, you can reduce operator subjectivity: “use Recipe R-01 for part A” is more consistent than “grind until it looks clean.” In regulated industries or high-value manufacturing, this repeatability is a core reason laser cleaning is adopted.
Another major strength is waste reduction. While laser cleaning does generate removed material (dust/fume/particulate), it is often far less bulky than spent abrasive media or chemical sludge. With appropriate extraction and filtration, waste handling can be simpler and cleaner. This is particularly compelling for factories that want to reduce abrasive blasting rooms, reclaim systems, and cleanup labor. The “cleaner shop” outcome is real—provided you design extraction properly, which we cover later.
Finally, laser cleaning can improve downstream performance by removing residues without mechanical smearing. For example, in weld preparation, eliminating oils and oxides in a controlled zone can reduce porosity and spatter variability. In coating, removing corrosion products thoroughly can reduce underfilm corrosion. These benefits are not universal, but they are common when recipes are tuned and verification is done properly.
7: Know the Limitations—When Laser Cleaning Struggles or Needs a Hybrid Process
Laser cleaning is not a universal replacement. It struggles or becomes less economical in a few common situations. First, very thick, elastomeric coatings (some rubberized paints, thick epoxies) can be slow because they absorb and char in ways that require multiple passes and robust fume control. Second, extremely high-throughput, low-value parts may not justify laser capex unless you automate and scale. Third, complex internal geometries where line-of-sight is blocked can be difficult; the beam must reach the surface, and although scanning heads and fiber delivery provide flexibility, they cannot “bend around corners” the way chemical immersion can. Fourth, highly reflective substrates (polished aluminum, copper) can reduce absorption; this does not mean it won’t work, but the process window can be narrower and may require specialized recipes and safety considerations due to reflections.
Heat sensitivity is another limitation. Thin sheet metal, sharp edges, and heat-treated parts can be affected if the process is not tuned. CW systems in particular can introduce heat tint or microstructural change if the beam dwells too long. Pulsed systems mitigate this, but they may require more time for heavy removal. This is where a hybrid approach often wins: for example, laser clean to remove oils/oxides and then use a light abrasive to create profile if required; or use laser to selectively clean critical zones while blasting handles large non-critical surfaces.
You also need to respect that laser cleaning changes the surface state differently than blasting. Blasting creates an anchored profile; laser cleaning can leave a smoother surface unless you intentionally texture (which must be controlled to avoid damage). If your coating system requires a specific roughness range, you must either validate that laser cleaning meets it or adjust the process. Many successful implementations treat laser cleaning as a precision cleaning and preparation step, not a one-size-fits-all surface engineering method.
In short: laser cleaning works extremely well within its sweet spot, and it can be engineered to cover a wide range—but you should expect to validate, tune, and sometimes combine it with other steps for the best total process.
8: Build the Safety and Fume-Control System—The Part People Underestimate
A laser cleaning machine that “works” technically can still fail in production if safety and fume control are neglected. You must treat the process as an industrial laser operation plus a surface-removal process that produces airborne byproducts. Key safety pillars include: laser classification and controls (interlocks, key switch, emergency stop), appropriate protective eyewear rated for the wavelength and optical density, controlled work zones (curtains or enclosures where feasible), training, and signage. Reflections are particularly important on shiny metals; the risk is not only direct beam exposure but specular reflection. This is one reason automated enclosed cells can be attractive for high-volume operations.
Fume extraction is equally critical. When you ablate rust, paint, or oil films, you produce a mixture of particulates and fumes. The composition depends on what you are removing; coatings may release complex compounds. Proper extraction at the point of generation, with adequate filtration (often multi-stage including pre-filter plus HEPA, and sometimes activated carbon depending on the contaminant), is not optional if you want stable production. Poor extraction leads to redeposition on parts, inconsistent cleaning, and operator discomfort—then people conclude “laser cleaning doesn’t work,” when the real issue is that the removed material is not being removed from the environment.
From a station design perspective, prioritize: (1) a nozzle or shroud near the cleaning zone (many cleaning heads integrate this), (2) sufficient airflow and capture velocity, (3) filter maintenance plan, and (4) waste handling procedure. The best factories treat filters and extraction as consumables and schedule replacement proactively. You should also consider noise (often lower than blasting), but extraction systems can add sound—plan accordingly.
When safety and extraction are handled professionally, laser cleaning becomes one of the cleaner surface-prep processes on the shop floor. When they are neglected, it becomes frustrating. This is not a minor footnote; it is part of making the machine truly “work” operationally.
9: Quantify ROI the Right Way—Cost per Part, Not Just “No Media”
ROI is where many buyers either win big or get disappointed. The correct approach is to calculate cost per cleaned unit (or cost per square meter) including labor, energy, extraction/filter consumables, maintenance, depreciation, and handling time—and compare that against your current method including abrasive, chemicals, disposal, rework, and downtime. It is true that lasers can eliminate abrasive media and reduce chemical usage, but if your line is handling-dominated, your savings may be smaller unless you improve fixtures or automate.
Use a simple, honest model like this:
| Cost Component | Blasting / Chemicals | Laser Cleaning | Notes |
|---|---|---|---|
| Consumables | High (media/chemicals) | Low–medium (filters, occasional optics) | Filters are real consumables |
| Labor | Medium–high | Medium (lower with automation) | Handheld still needs skilled labor |
| Waste disposal | Medium–high | Low–medium | Depends on coating/contaminant |
| Rework / quality drift | Often medium | Often lower after recipe lock | Requires disciplined parameter control |
| Capex | Medium | Higher | Laser pays back when utilized |
| Downtime/cleanup | Higher | Lower | Extraction maintenance is the tradeoff |
Then run scenarios. For example, if you have a blasting cabinet that consumes significant media and requires frequent cleanup, laser may pay back quickly. If you already have efficient blasting with reclaimed media and stable quality, the ROI may depend on whether laser eliminates a bottleneck or enables a premium-quality outcome (less base loss, better adhesion, or less scrap). Also consider opportunity cost: if laser cleaning enables you to bring outsourced cleaning in-house, shorten lead time, or improve consistency, that can be worth more than direct consumable savings.
The most accurate ROI model uses your actual production volumes. A 2 kW CW system can be extremely productive on large steel surfaces; a 200–300 W pulsed system may be the right choice for precision tasks with lower area per day but high value per part. “Laser cleaning works” commercially when the machine’s utilization is planned and the station is integrated into your workflow.
10: Implementation Checklist—How to Make Laser Cleaning Work on Your Shop Floor
To close the loop, here is a practical implementation checklist that consistently leads to successful results:
- Define outcomes: rust grade removal target, coating adhesion requirements, weld quality metrics, allowable substrate effects.
- Select architecture: CW vs pulsed based on contaminant thickness and substrate sensitivity; decide handheld vs automation based on repeatability needs.
- Run parameter trials: build a recipe matrix, document results, choose robust windows not knife-edge settings.
- Design extraction: size the fume extractor, choose filtration stages, ensure capture at the head/shroud.
- Train operators: standoff distance, scan overlap discipline, angle control, and when to stop (avoid over-cleaning).
- Create SOPs and recipes: lock settings per part family, include inspection steps, and define rework criteria.
- Verify downstream: paint adhesion tests or weld tests to confirm the cleaning is not just cosmetic.
- Plan maintenance: optics inspection, lens cleaning schedule, filter changes, and calibration checks.
- Measure throughput end-to-end: include handling, fixtures, and real takt time, then iterate station design.
- Scale intelligently: once recipes are proven, automate repetitive work for stable ROI and reduced variability.
If you follow this sequence, laser cleaning moves from “cool demo” to “stable production process.” That is the line between owning a laser and operating a laser cleaning process that pays for itself.
So—Do Laser Cleaning Machines Really Work in Real Factories?
They do, and they can be transformative—when you treat them as process equipment that must be matched, parameterized, and integrated. Laser cleaning is not a universal hammer, but in the right architecture (CW or pulsed), with validated recipes, proper fume control, and clear acceptance criteria, it delivers repeatable cleaning with minimal consumables and strong controllability. The factories that succeed are not necessarily the ones that buy the biggest wattage; they are the ones that define “working” precisely, validate on real parts, and lock down recipes like any other critical production process.
If You Want This to Work on Your Parts, Not Just in a Video
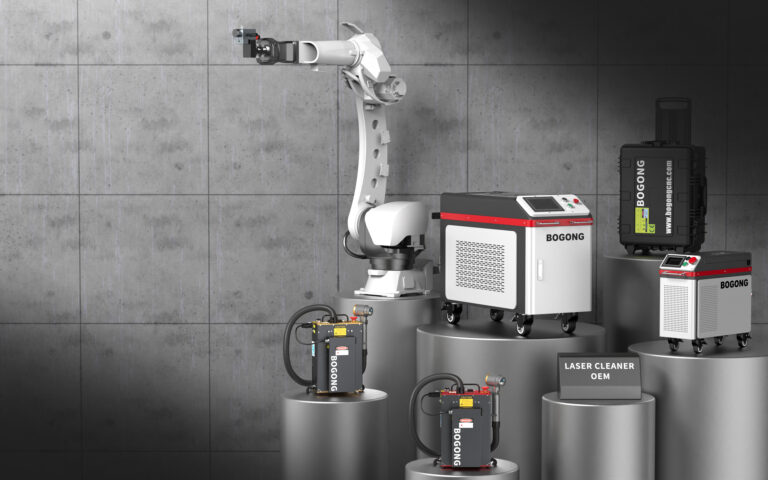
If you’re evaluating laser cleaning for rust removal, paint stripping, weld prep, mold cleaning, or precision surface preparation, the fastest way to get a confident answer is to run controlled trials on your real samples and build a recipe window you can repeat on the shop floor. At BOGONG Machinery, we focus on practical implementation: matching the laser type to your contaminants and substrates, documenting parameters, and helping you design a station that is safe, clean, and productive. Contact BOGONG Machinery with your material, contamination type, target finish, and throughput requirement, and we will propose a configuration and a validation plan that you can actually run in production.
Talk to Bogong Laser Cleaning Machines ExpertsGet a Quote or Customized Solution for Your Application

-
Whatsapp: +86-15665870861
-
Email: info@bogongcnc.com